Showing posts with label paint. Show all posts

Friday, October 5, 2012

project lately: painted lace kids table

hi!

we recently acquired a hand-me-down white table and i made it my own.  paint.  that's what i do.

not a step by step tutorial with pics, because frankly, this project was a let's do this, ok, hmm, let's do this... and use what we have.  and i was lazy.  what's new.

i wanted a chevron table but thought if i didn't get it perfect, i would go bonkers looking at it everyday.  and i might put this little lady in the playroom when it starts to get yucky.  but i definitely DIDN'T want to keep a white table in the kitchen for the chicks to eat on.  especially nutella waffles.  gross. this disguises messes much better. 

basically i:
*  used painter's tape to tape a rectangle off the top,leaving a space around the edge. i wanted to have a matching leg/top border.  press hard on that painters tape so paint doesn't seep under.
*  painted the legs and the edge of the table top (space 1) a coral color i had in the paint cabinet.  it's persimmon red by martha stewart.
*  using that tape, make your lace rectangle (space 3). i used rolls of some vintage lace about 3 inches wide.  i was searching for a regular, rectangle shaped piece of lace, which would have been easier, but couldn't find any.  i used spray adhesive to fill in this whole space, using 5 strips of lace.  you can see the strips in the finished piece.  it annoyed me at first, but oh, well. in the paint cabinet was a can of spray paint, i think the color was called champagne canyon.  just some krylon left over from a project... i sprayed it all over that space, taking care to stay inside the tape.
* let it dry overnight.
* this is where it's confusing to explain. i pulled the tape off.  then i used new tape to cover the edge of the lace and also cover the coral border.  i covered space 1 and space 3 with tape and it created space 2. (whoa, i don't think that makes sense AT ALL?!?!?)  it's just basically exactly where the tape was before- but you need to put down tape to keep your lines straight and keep your colors separate.  i painted that a tan acrylic paint i had.  

anyway.  voila.  funky new look, and somewhat neutral color palette. better than it was. 
and horrible instructions.  sorry.  i'm writing this after a 5 hour playdate with a 4 year old, 3 year old, 2 year old and 1 year old.  fun but, you know. 


  ugh.  next on the list, chair update.  those are looking pretty darn grubby! 


Wednesday, August 29, 2012

project lately: distressed glazed chairs

project lately: distressed glazed chairs


man, do i have the painting bug.  this past couple weeks, i've painted anything i could get my hands on. kids chairs, outside fridge (pink!!!) , kitchen chairs, benches, kids table, bookshelves, pantry doors, bathroom door, front door. 


waking up with the girls at 6:30, getting them a bowl of cheerios and getting to work in the driveway before it gets too hot.  those chicks are awesome at having some outside fun:  drive the gator, play in the sand box, paint with water in the driveway and sidewalk chalk until they're as dirty as you can get- then it's the hose and the kiddie pool and inside for some bananas and grapes.  


meanwhile, i get my paint on.  

i bought some chairs for 100 bucks on craiglist a bit ago and they sat in the garage until i got around to buying my materials.  they are great- sturdy, awesome carved detail and best of all they all MATCH.  for whatever reason, when we moved in, i thought a mismatched set of chairs would look.... quaint? cute? hello- totally random and not good. 

i was ready for something new. 

took those babies outside and covered them with a coat of antique white paint. (and no, i didn't sand. partly because i was going for a distressed look in the end.  but mostly because i am LAZY, LAZY, LAZY) and good gracious, that painting took FOREVER! there are 8 spindles on the back of each chair as well as 4 legs, with 8 horizontal supports on every chair! so many little spots i would miss.  so i just went inside and then came out and touched up. many times. 

 
they actually were really pretty all white.  but i knew kiddo's grubby hands, my messiness in the kitchen and craft projects would have them dingy in no time. 

i had read about brooke's (her blog all things thrifty is one of my faves) glazing projects many times and loved how they turned out. so i read once more her glazing 101 post, took a deep breath and destroyed my lovely white results! 
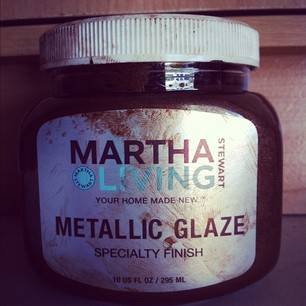
bought martha stewart's metallic glaze from home depot. i used the color muscovado.  followed brooke's instructions: wipe on glaze, wipe off with a wet cloth.  by this time, my sweet hubs came to help.  we wiped on and wiped off to our hearts content.  left it thick in some spots and more off in others. 
 
by no means perfect but i LOVE how they turned out.  the details up top are just gorgeous and they look aged and well loved.  they look fantastic around my old dining table.  they are comfy for sitting around and i can't wait to enjoy a meal with others, sitting there long after dinner's over.  
so give glazing a try!  so fun. 


meanwhile, while writing this post, someone got into the nutella.  can't say i blame her.